There are lots of displays available for Arduino and the Nokia 5110 LCD is one of them. It uses the PCD8544 controller and it is the cheapest to offer a graphic surface. For years it had interfaced Nokia phones and due to its simplicity and reliability it has found a new life in the Arduino world.
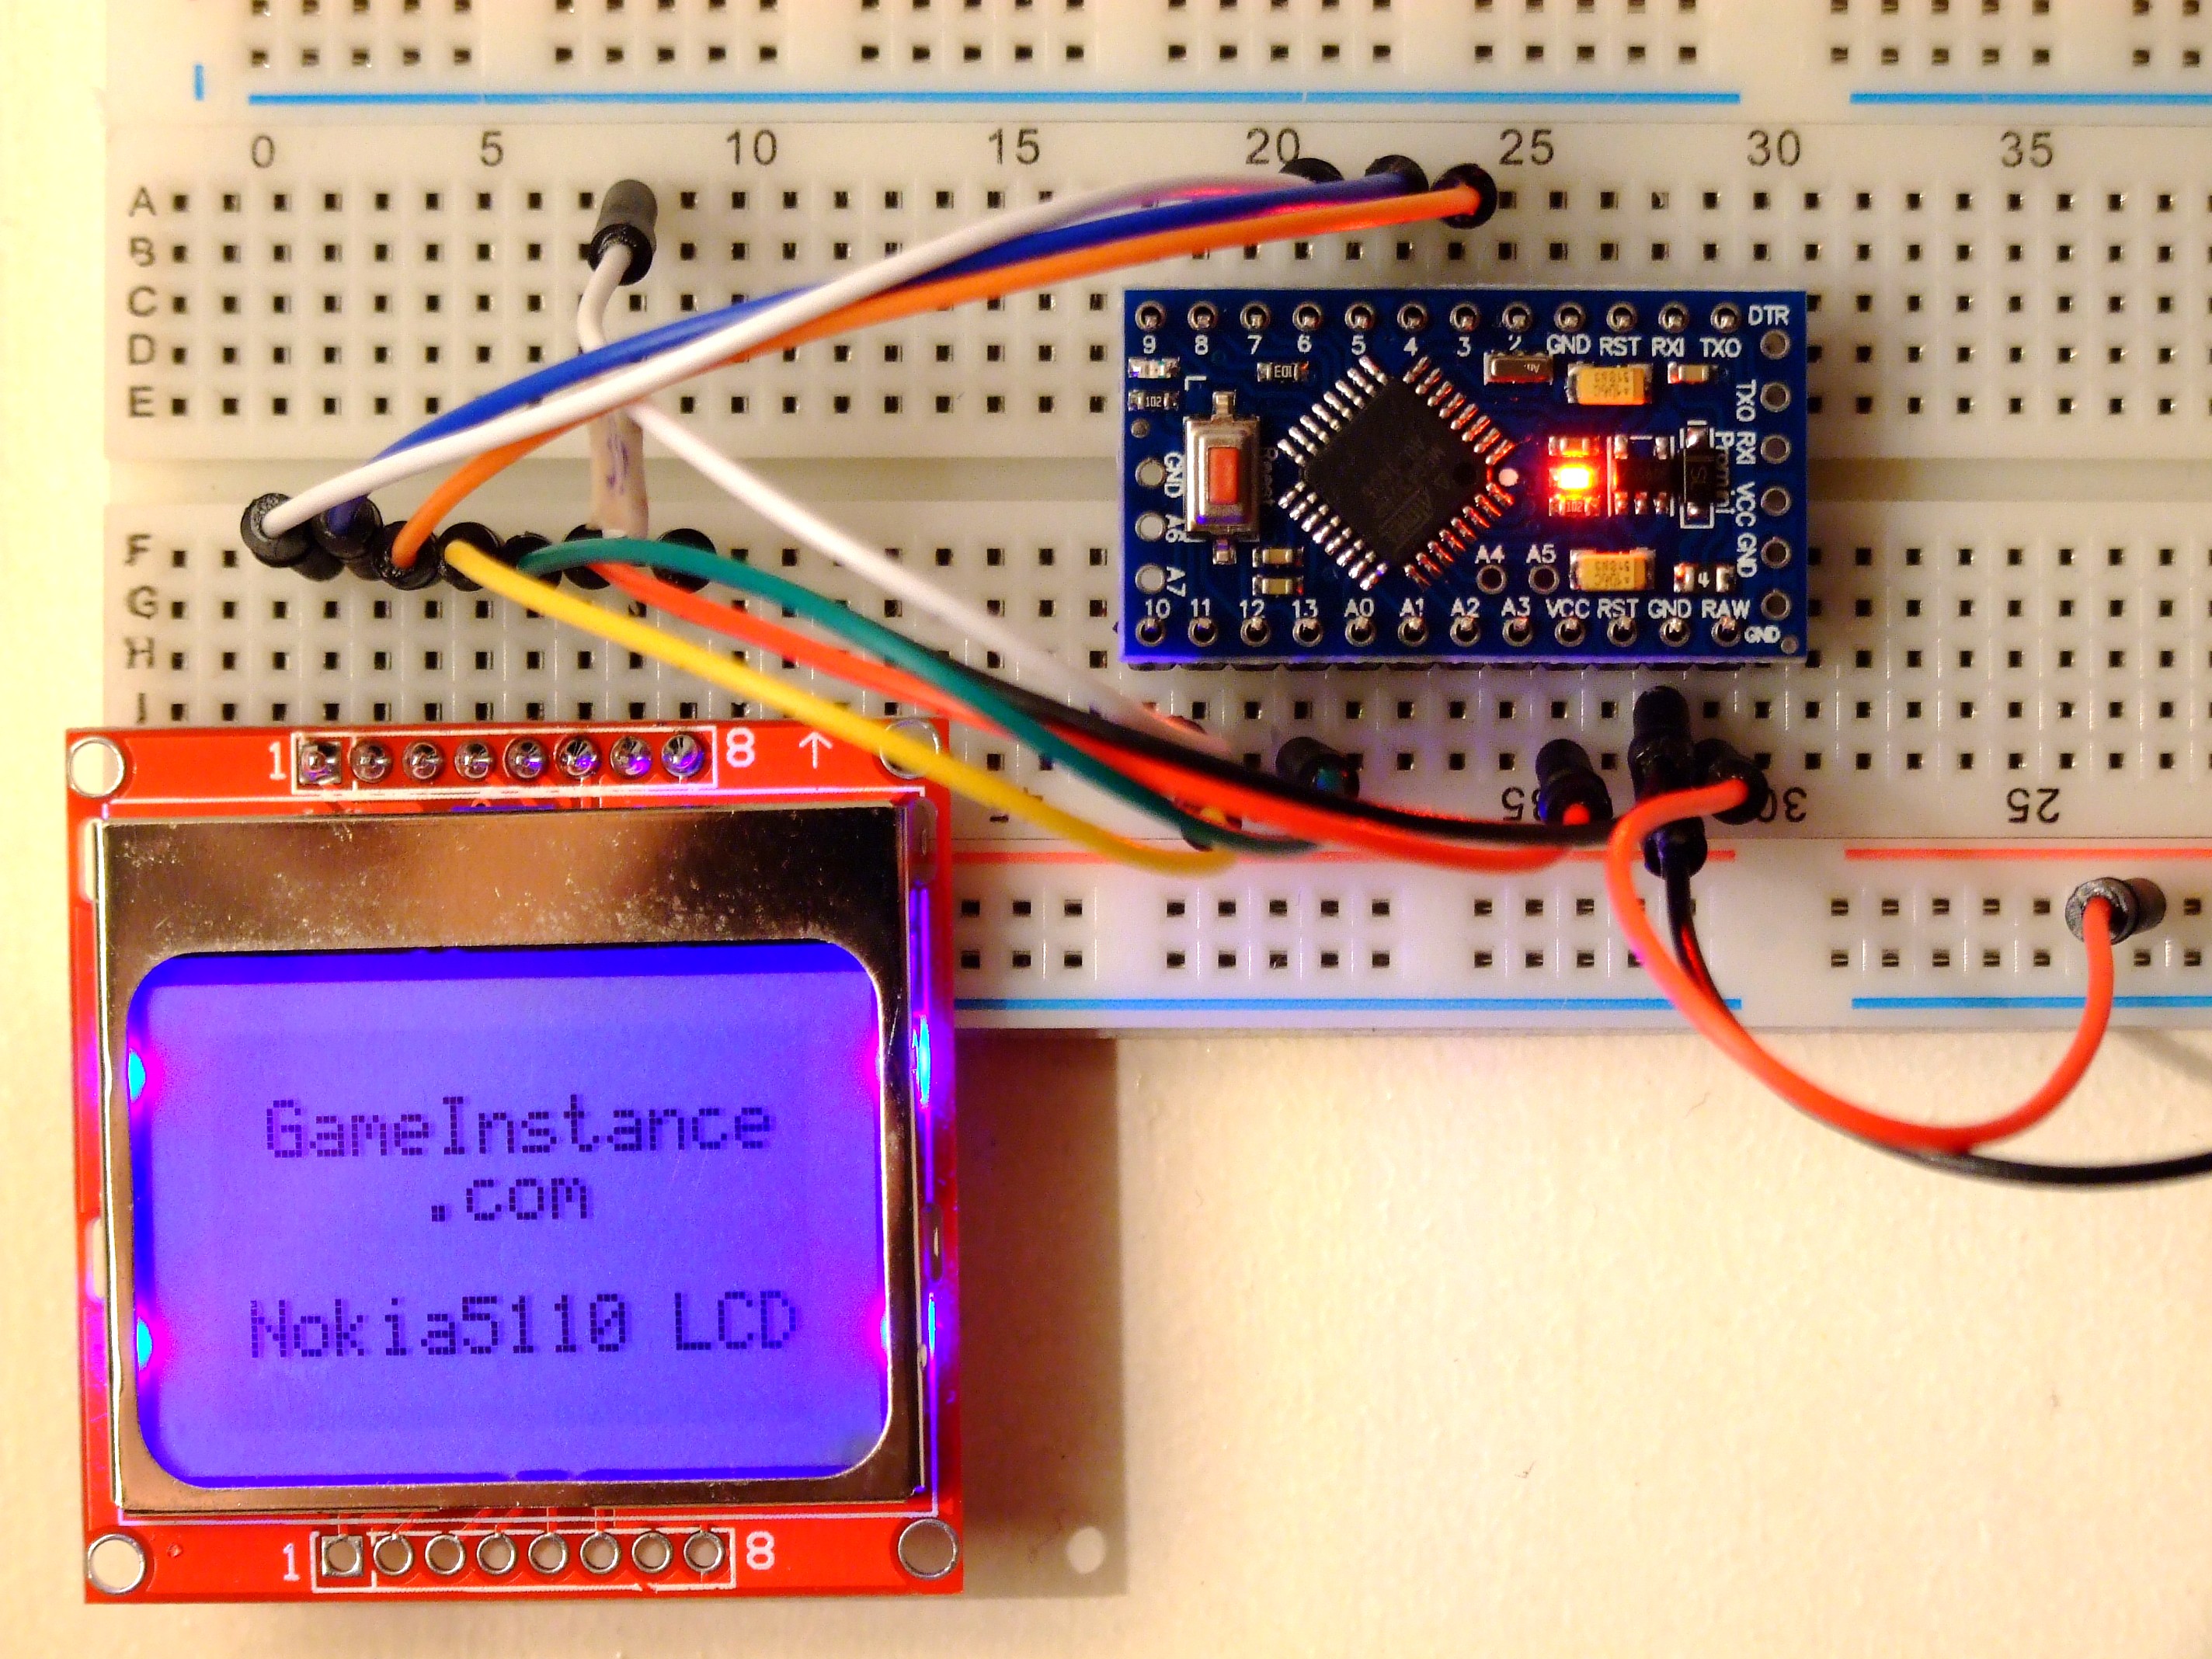
 Nokia 5510 LCD and Arduino Pro Mini - breadboard setup
Connections
The part requires soldering for the 8-pin breadboard-friendly connector. Other than that you'll only need a 330 Ohm resistor for the LED light pin and some jumper wires to get it working.
Nokia5110 to Arduino:
SCE ---------------- 6
RST ---------------- 7
DC ----------------- 8
DN ----------------- 11
SCLK --------------- 13
LED ----330 Ohm --- 10
VCC ---------------- Vcc
GND --------------- GND
While SCLK and DN must be connected to pins 13 and 11, the rest can use any combination of digital output pins but to be able to dim the light, you'd want to keep the LED connected to a PWM capable pin.
Remember
Do not connect the LED input directly to the Arduino logic pin. There are four parallel LEDs lighting the back of the display. At the HIGH controller output voltage, the drawn current will exceed the recommended per pin rating. That'll shorten its life or even fry the micro-controller.
In case you do not have the resistor you may leave the display LED pin unconnected or hook it to GND. That means no LCD back light will be available for your application.
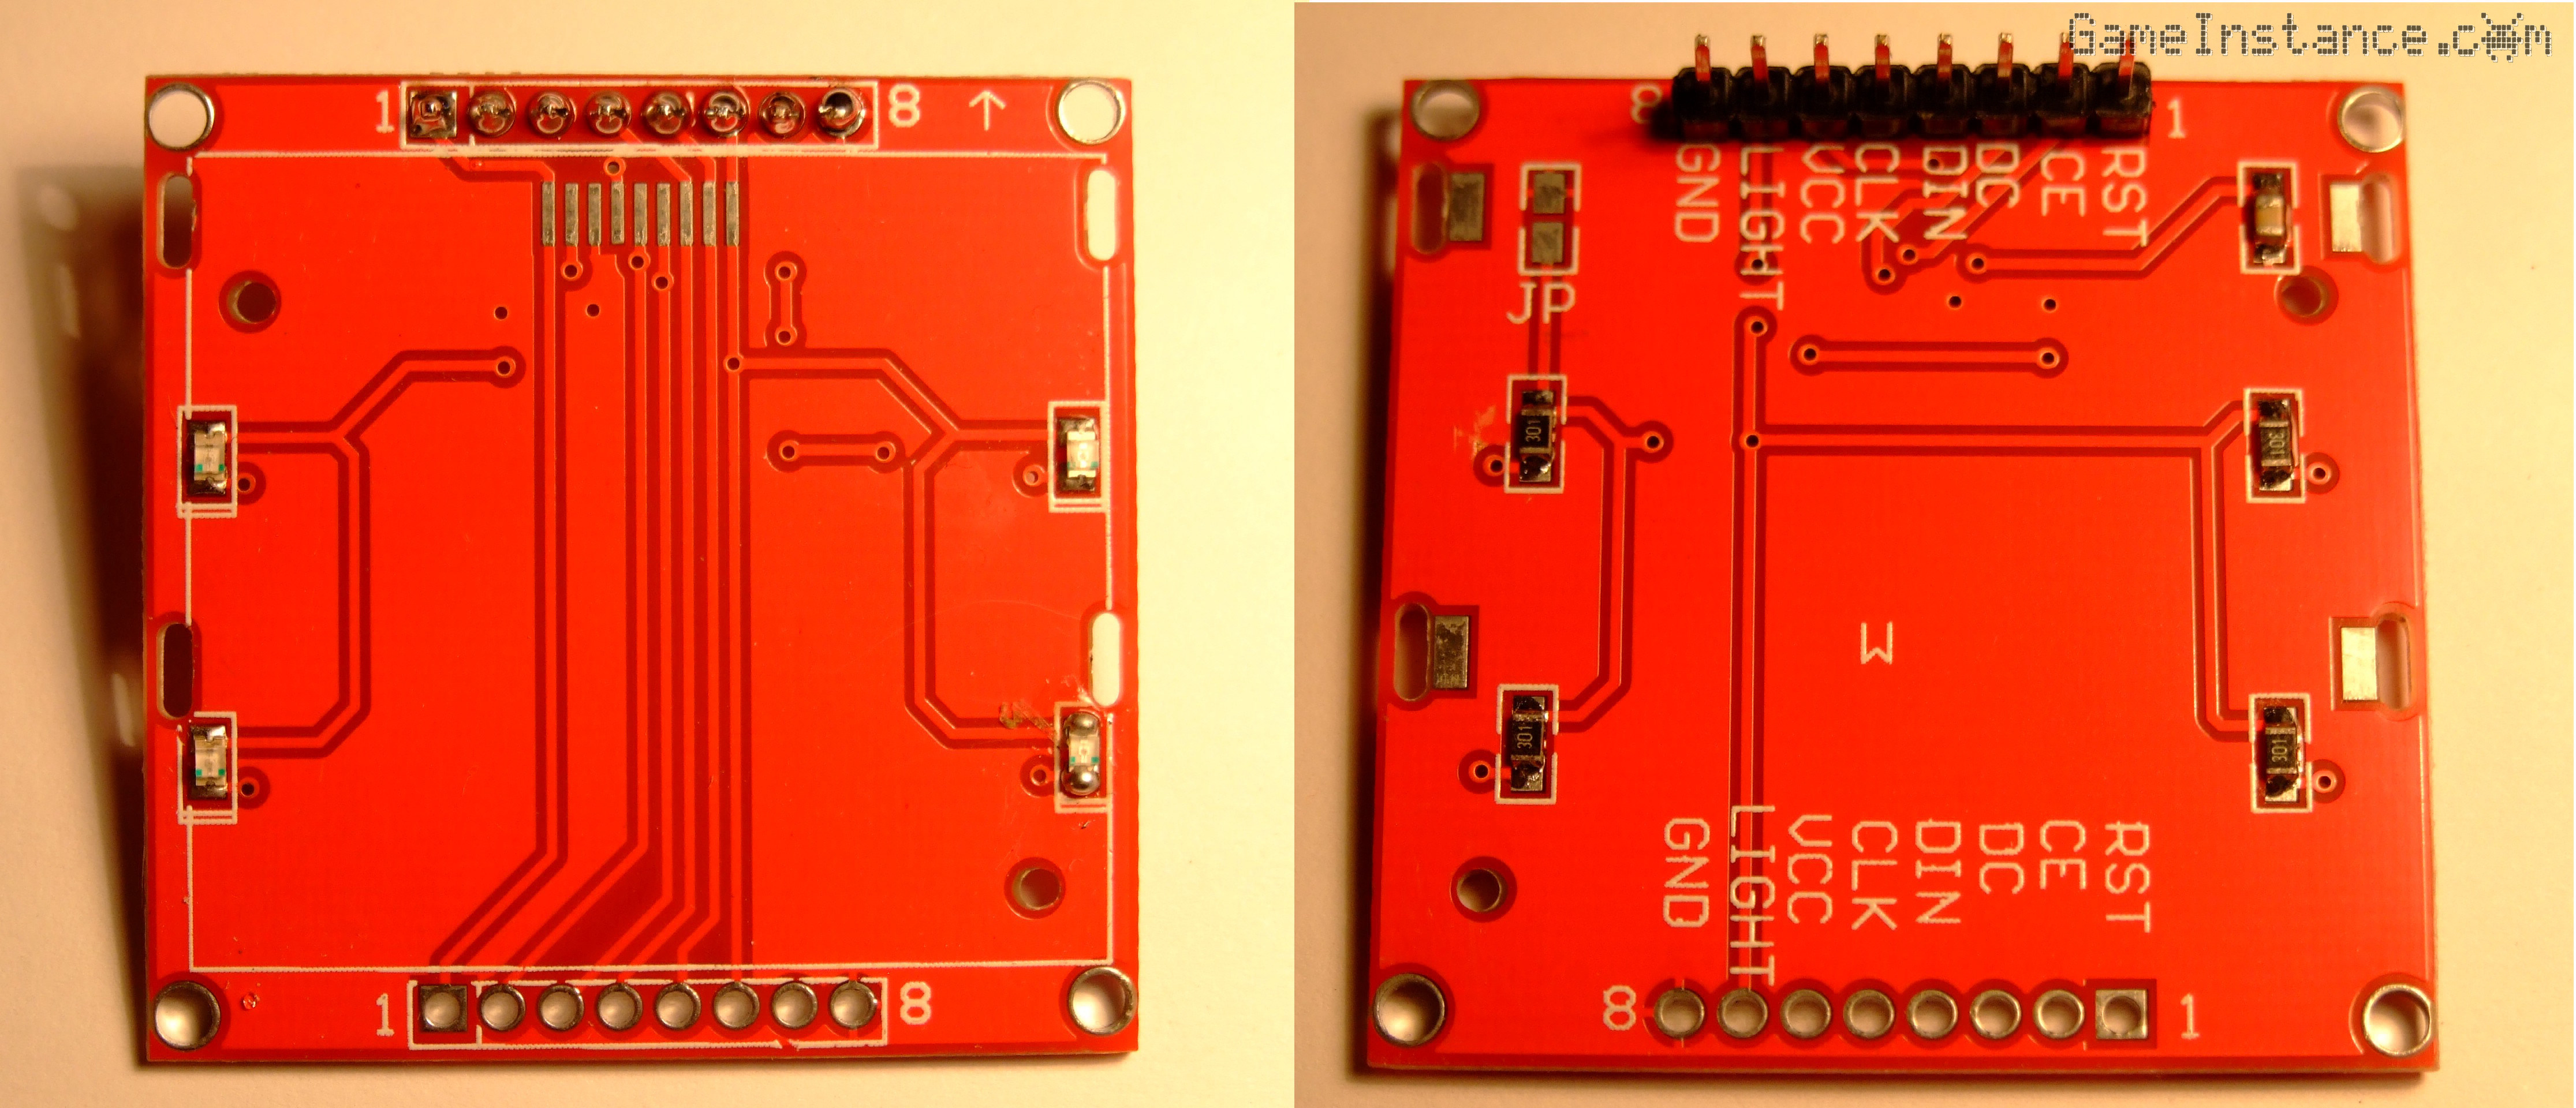
However, some manufacturers started including the current limiting resistor into the display board, simplifying the prototyping process even more.
 Nokia 5510 LCD - the dual-layer PCB - LEDs on the front, 300 Ohm resistors on the back
Resources
There's a lot of useful information about it on Sparkfun and I advise reading that as a starting point. Using their examples, I've managed to create my own text and graphics library.
Check-out: LCDNokia5510 on GitHub