I sort of ended abruptly my previous post. I thought about making some performance measurements on the graphics of the Nokia 5110 display and post those too. Then I said to myself, what a wonderful ... wait, no, not that. I said it's small monochrome display, for Pete's sake! There's no better way to test it than against an application from the same era. The only one that popped into my head was the Snake game.
The game
is a single-player arcade. It uses two buttons, for turning left and right. Just like in the original Nokia 3310 game, you're supposed to guide the creature on the board to eat the randomly appearing items, adding-up to the length of the snake, thus making it increasingly difficult to maneuver. The game is over if the snake touches itself or the screen bounds and is complete when all food items have been consumed.
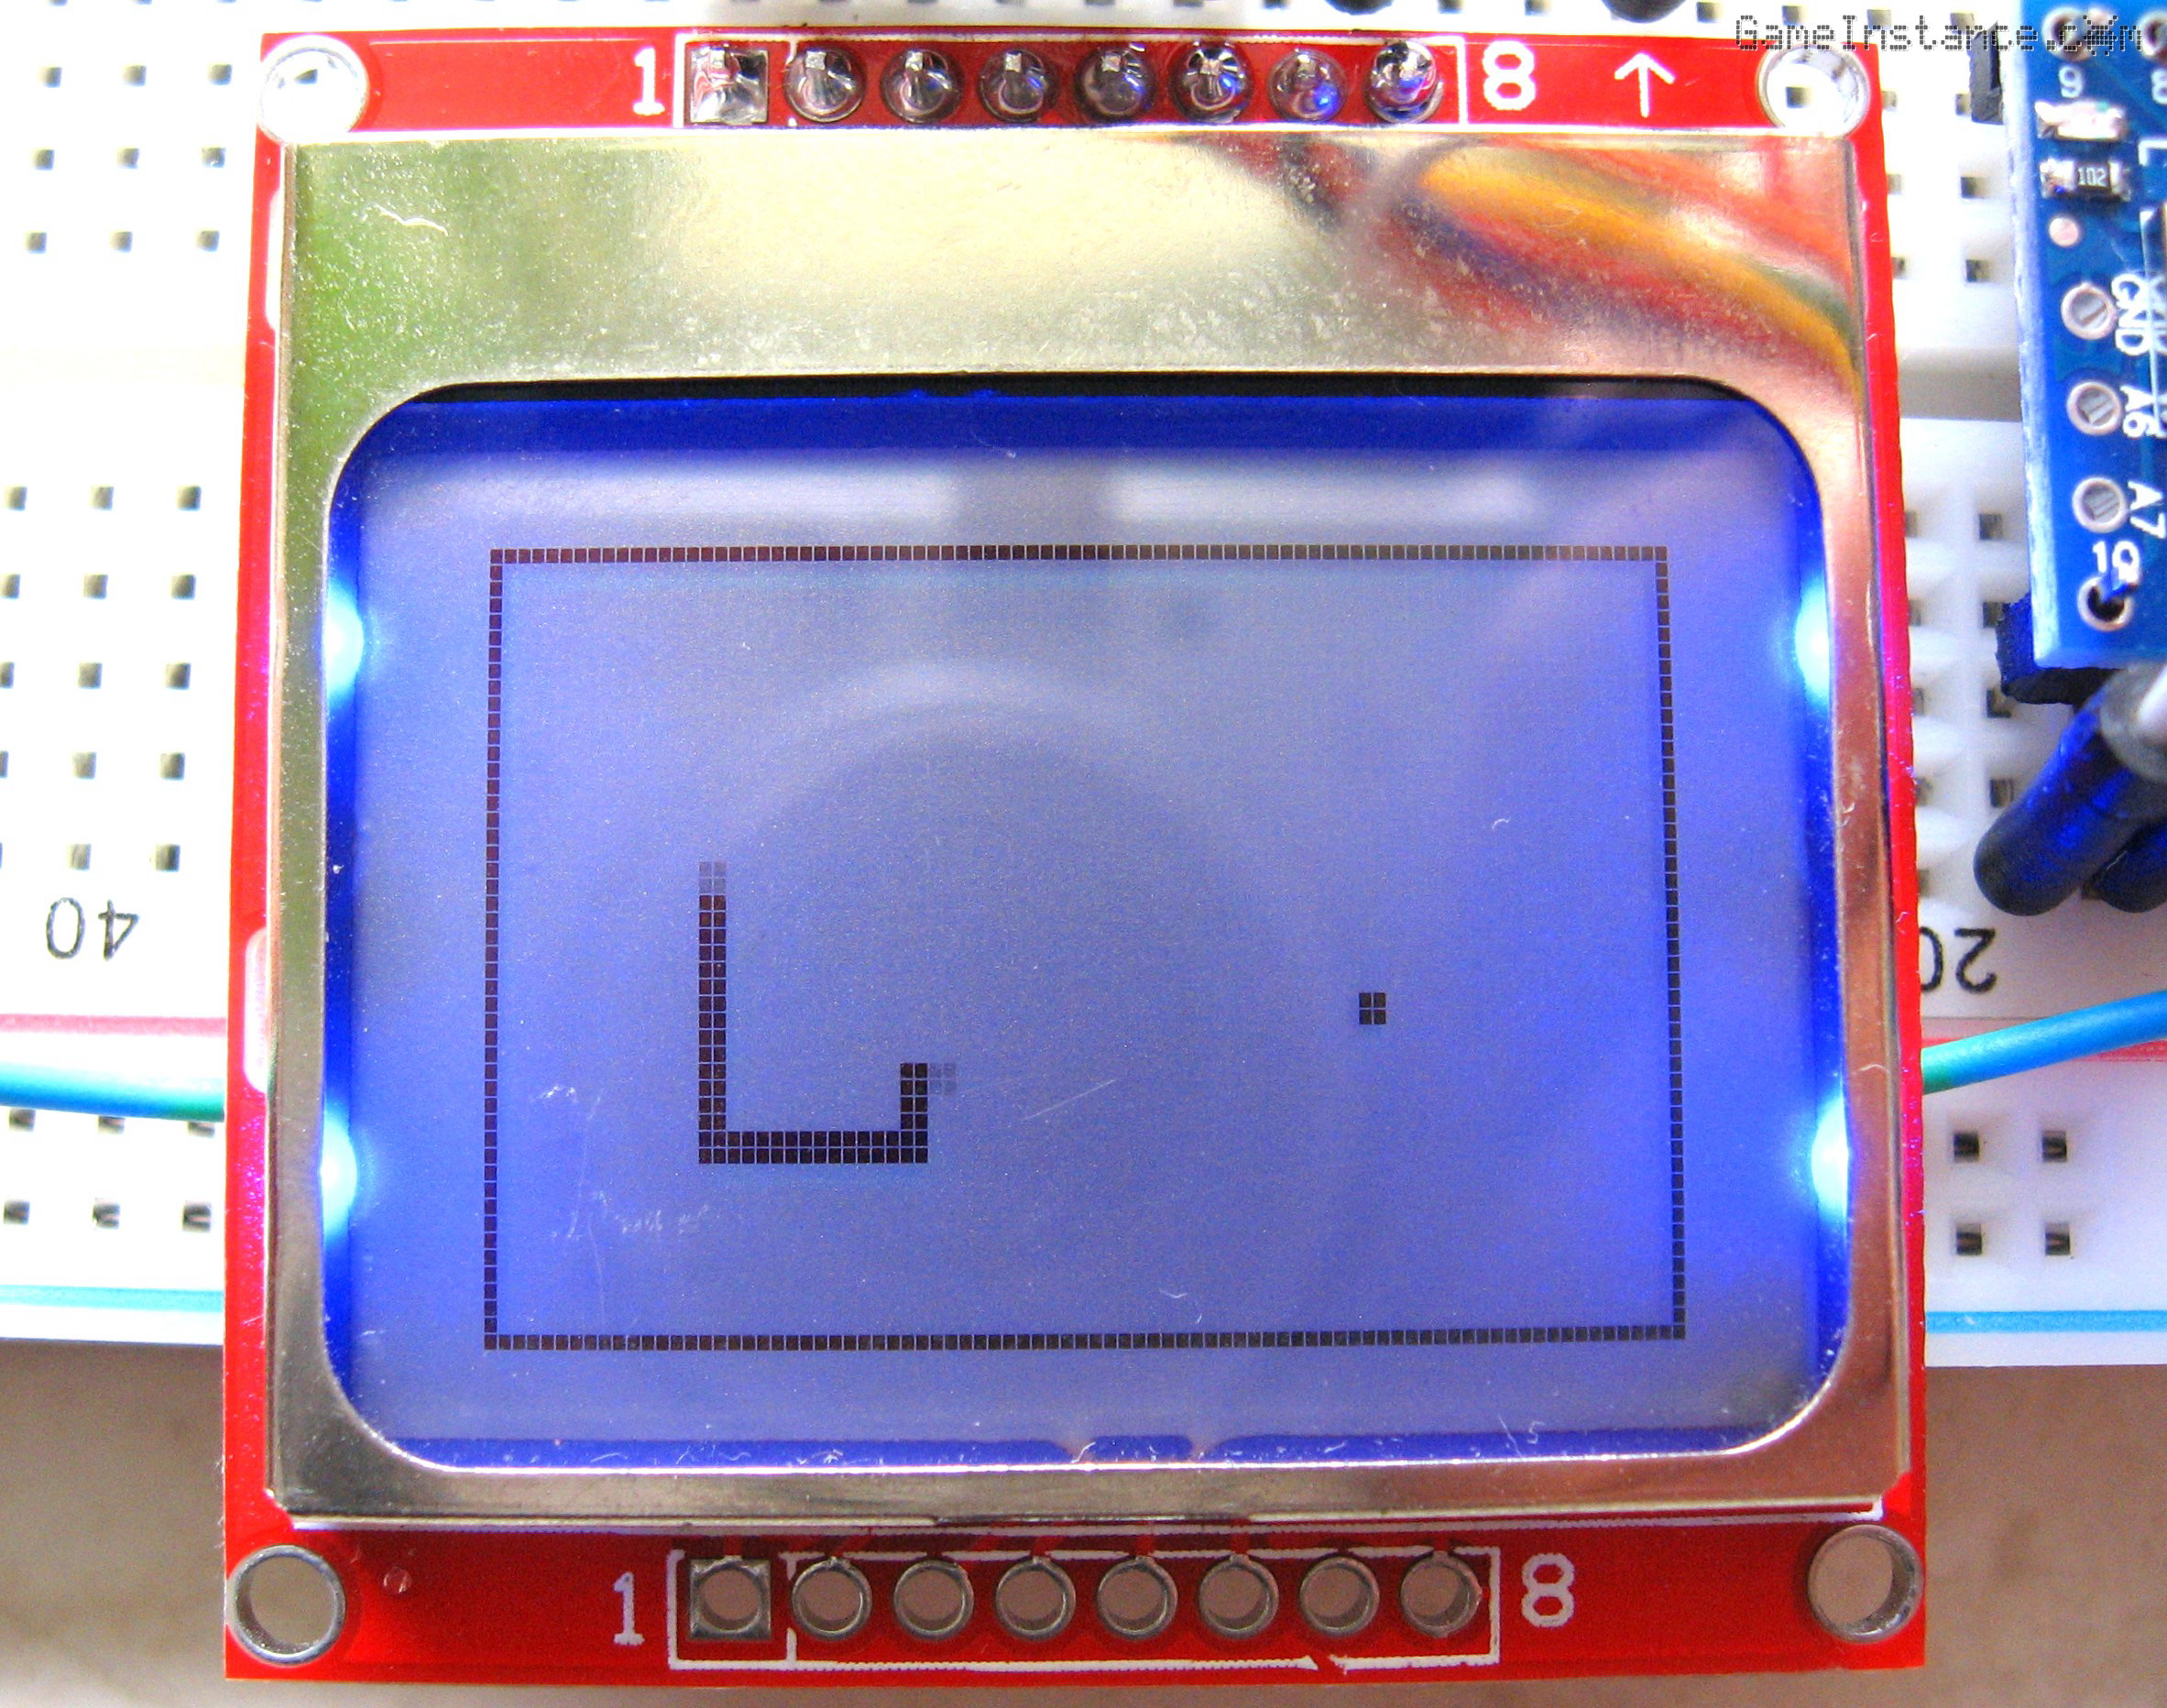 Nokia 5510 LCD and Arduino Pro Mini - breadboard setup for the Snake game
The hardware
The rig is composed of the Arduino, I prefer the Pro Mini, the Nokia 5110 LCD display with its 330 Ohm limiting resistor, two 10 KOhm pull-up resistors and two micro-switches for the buttons. A breadboard would come handy unless you want to solder all the parts.
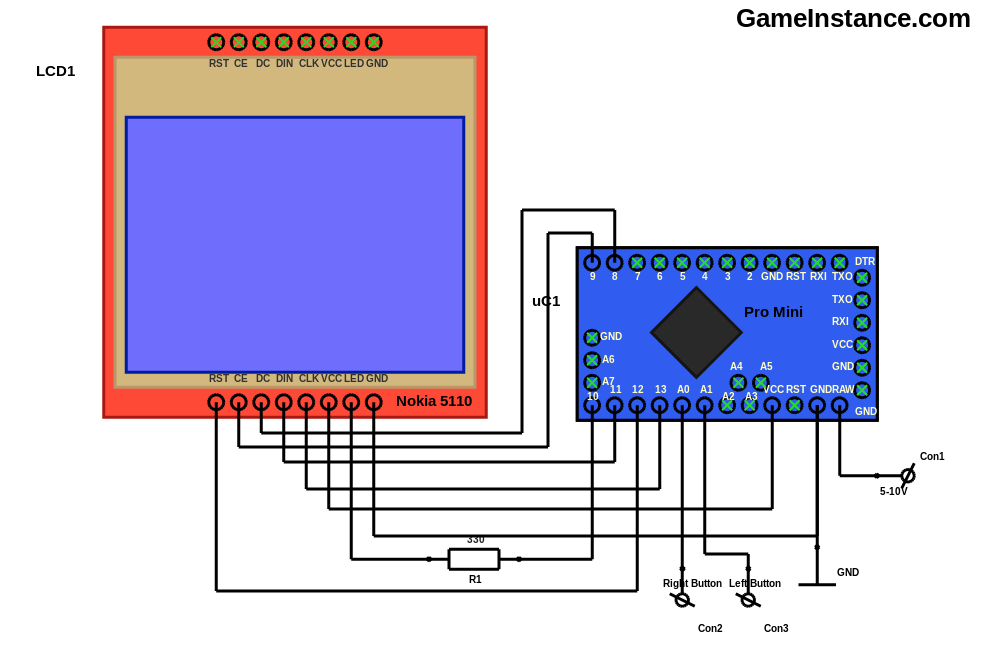 Arduino and Nokia 5110 LCD schematics for the Snake game
Most of the setup is the one described in the Nokia 5110 LCD for Arduino post. Note that the display connections in the image above are a bit different, so be sure you make the corresponding changes in the code.
 Buttons circuit schematics for the Arduino Snake game
The buttons are toggling from Vcc to GND two analog inputs. Could have used a digital input, I know, but that serves the purpose as well so why not?
For this project I placed the display in the middle of the breadboard, with the Arduino on one side and the micro-switches ergonomically towards the left and right edges. The game's reset button is the Arduino reset button.
The code
relies mainly on two classes: Snake and Food. The Snake is composed of multiple blocks, hence the third Block class. The Snake and Food objects are managed by a fourth class called Game.
Modeling the snake's slithering movement is by far the nicest piece of code in the program. That is obtained by propagating each block in its specific direction using the snake's speed modulus. To handle the pivoting, each block gets the direction of the previous block and the first block gets to be controlled via left and right commands. Below is the snippet of that code.
    void Execute(byte dt = 1) {
      //
      byte dx, dy;
      for (byte i = 0; i < m_Size; i ++) {
        //
        GetDirection(dx, dy, m_Blocks[i]->m_d);
        m_Blocks[i]->m_x -= m_Speed * dt * dx * m_Weight;
        m_Blocks[i]->m_y -= m_Speed * dt * dy * m_Weight;
      }
      m_HeadX = m_Blocks[0]->m_x;
      m_HeadY = m_Blocks[0]->m_y;
      for (byte i = m_Size - 1; i > 0; i --) {
        //
        m_Blocks[i]->m_d = m_Blocks[i - 1]->m_d;
        if ((m_HeadX == m_Blocks[i]->m_x) && (m_HeadY == m_Blocks[i]->m_y)) {
          //
          m_bSelfTouch = true;
        }
      }
      m_Blocks[0]->m_d = m_Direction;
    };
The rest of it can be found as SnakeOnArduino on GitHub.
The conclusion
Wrapping it up, the display is OK. Not bad, not great, just OK. It does what's supposed to do and it uses few digital outputs to achieve that. On the down side, it's small and not very visible from a distance nor when used in daylight, reminding me of my old Nokia phone. The most annoying part is that, with temperature, the image contrast changes. In low contrast conditions, noise is picked up and converted in visible shaky horizontal lines on the screen. But hey, that's normal with LCDs in general. Commercial displays have built-in temperature compensation circuits for that.